Pastry For Quiche
Not only do I think it’s easy to make pastry for quiche, I also find the whole process therapeutic.
Most recipes tell you to add 1-2 tablespoons of water to the pastry dough. I use either cottage cheese, yogurt or crème fraiche instead. Cottage cheese will make the least calorific pastry, and whatever dairy product I put in the pastry, I also add to the filling of the quiche.
And then there is flour. These days in the UK you can get your hands on really good stone-ground, organic flour from specialist mills in the bigger supermarkets.
You pay a little bit more for these types of flour but here’s the deal – in mass produced flour most of the nutrients have been removed while a wide variety of additives have been added.
I used to make my pastry for quiche with a mix of wholemeal (wholewheat) flour, spelt and white flour for my pastry. Of course, the more white flour you use, the lighter pastry you get. But increasing the other types of flour will make the pastry much more interesting taste-wise, and healthier.
Lately though, I've made my pastry for quiche with only wholegrain spelt flour (see Butternut Squash Quiche, Beetroot Quiche and Broccoli and Spinach Quiche) and this has produced the tastiest pastry ever.
To make gluten-free pastry for quiche, click on Gluten-Free Quinoa Quiche.
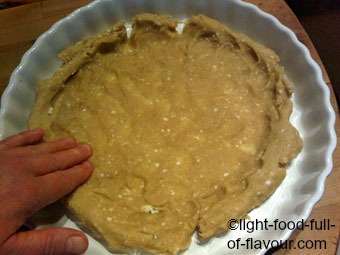
I stick to the same measurements when using nothing but wholegrain spelt flour, even though I end up with a pastry dough that is a little bit stickier. As I press out the pastry with my hands (see below), this is not a problem.
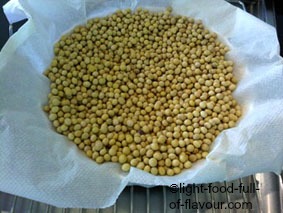
It is necessary to blind-bake the pastry first to stop the pastry from collapsing. This is done by covering the pastry with baking parchment and then adding some kind of baking beans on top.
There is no need to buy ceramic baking beans – use a bag of dried beans instead, or something like it. You can re-use these over and over again. Just make sure you have enough to cover the base of the pie dish and up the sides.
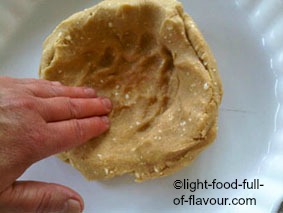
I use my hands to make my pastry for quiche. There are no machines involved. I find that I can use less flour this way and get a really flaky pastry that melts in your mouth.
And instead of chilling the dough before pressing it out in the pie dish, I chill it afterwards. Trust me - it works!
110g, 3¾oz, 1 stick, lightly salted butter, cut into cubes
165g, 6oz, 1.2 cups flour - spelt, wholegrain or wheat
1 tablespoon of plain cottage cheese, or crème fraiche/ natural yogurt
Pie dish, approximately 23cm/9in in diameter
Baking parchment and baking beans (see above)
1. Put the butter and most of of the flour into a large bowl. With your hands, quickly work the ingredients into a dough. Flatten out the dough in the bowl and place the tablespoon of whatever dairy product you are using in the middle of the dough. Fold in the sides, then add the rest of the flour to the bowl and quickly work it all together. You should end up with a very soft, but not sticky dough.
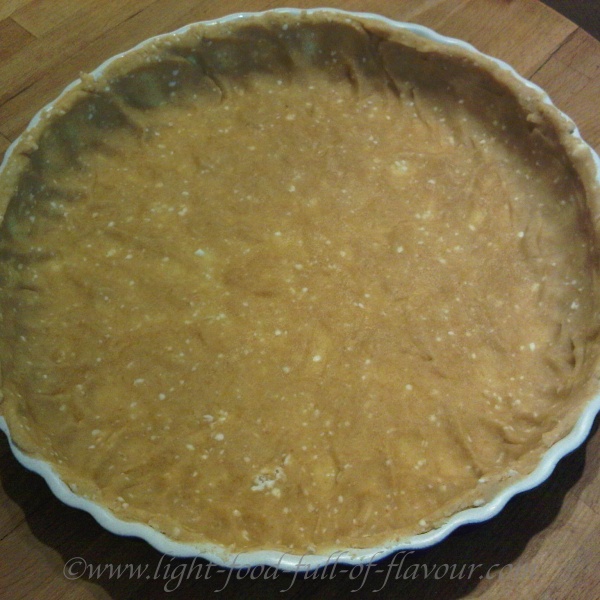
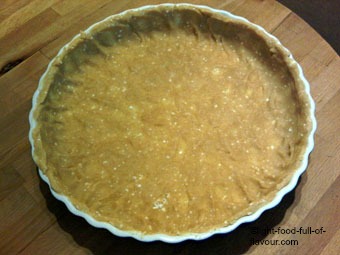
2. Once again, flatten out the dough and place it in the middle of your pie dish. With your fingers, keep pushing out the dough from the middle towards and then up the sides of the dish until it looks reasonably even (see three first photos below). Place the pie dish in the fridge for 30 minutes
3. Heat the oven to 200C/fan180C/400F/gas mark 6. Take out the pie dish and use a fork to prick the pastry all over the bottom of the pie dish (this is done to prevent the pastry from rising in the middle). Cover the pastry with baking parchment, place whatever baking beans you are using on top (last photo below) and bake in the oven for 15 minutes.
4. Take out the pie dish and carefully remove the baking parchment and the baking beans. If the sides have collapsed a bit, then take a teaspoon and gently press the back of the spoon all around the edge of the pie dish to make the sides rise a bit. But hey, don’t fret if the pastry is a bit uneven – that rustic look is what might convince people that you actually made it!
5. Return the pie dish to the oven for another 5 minutes until the pastry starts to brown a little. Take it out of the oven.
You’ve now got a gloriously tasty pastry for quiche, a pastry-case ready to be filled.
One of the best things with quiches is that they tend to taste even better the next day. This makes them excellent food to make in advance. Bring on that party!
 |
 |
 |
 |

“So long as you have food in your mouth, you have solved all questions for the time being.” Franz Kafka
Get delicious and nutritious tips and tidbits in my monthly Newsletter. You will get time-saving cooking tips, ideas for how to make your diet more nutritious and flavourful recipes.
Subscribe today and you will get an instant download to my Ebook “A Tasty Way to Salsa, Dips & Sauces”.
Click on Tasty & Healthy Nuggets to subscribe..
This ebook will show you how to lose weight with tasty and healthy easy-to-follow recipes, time-saving advice and nutritional information.
